


If you love your terminal or want to go full geek and publish articles from your terminal, look no further than the Hashnode CLI. The Hashnode CLI allows you to:
- Create stories
- Set writing goals
- View your writing goals
It's open-source so you can always improve it. I built this project for the #christmas-hackathon for two reasons:
- Win the prize (obviously) and
- Build my first useful open-source project/npm package
In this post, I'll write about the process of building the CLI and how the community can make it better.
Skip the long talk, how can I get started?
All you need to do is run this
npm i -g hashnode-cli
Writing goals
Then you can view your writing goals
hashnode-cli goals
# No goals set
Oh, I forgot, we need to set a goal first
hashnode-cli goals -n="Earn top contributor on Hashnode before Febuary"
# New writing goal set
Now, we can view our goal.
Authentication
Apart from setting goals, we can create posts, but before we do that, we need to authenticate the CLI
hashnode-cli login

# Output
# Opening the developer settings.
# ? Paste Hashnode developer token? a4fead27-***************************
Pull Request idea. Change this token prompt from input to password
It opens this page on the browser
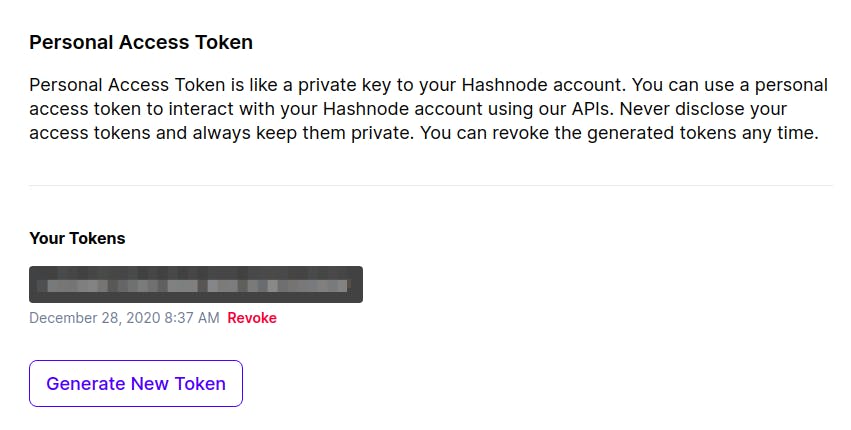
Generate and paste the token on the terminal. It should give this output.
Token securely saved.
Creating a story
Now, for the moment of truth, creating a story from the terminal.
hashnode-cli create-post --title="Why you should focus on fewer technologies in 2021"
This should bring up nano
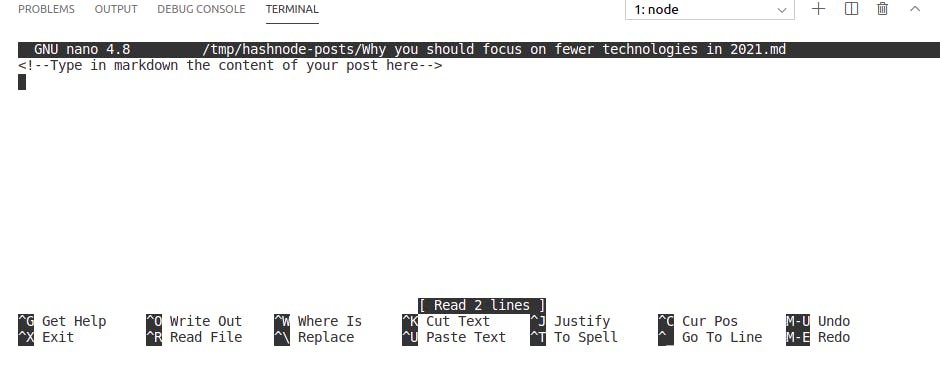
Type in some content such as
<!--Type in markdown the content of your post here-->
## Introduction
The tech space is constantly changing. New technologies are realeased weekly. Javascript developers can attest to this. Every year, new frameworks are realeased. But with all the hype, you shouldn't speed all your time trying to keep up with the pace. Intead, you should focus on improving your existing skills or gaining new skills that will help you in your work.

## The star vs T-shaped developer
...
You can add more text if you wish.
When you're done, exit nano using ctrl X and save the file.
Select the appropriate tags. I only used beginner developers

On successful creation, you'll be given a link to view your terminal-geeky story 😁.
hashnode.com/post/why-you-should-focus-on-f..
TaDa, you successfully gave up the traditional browser way of story publication and became a terminal warlock. 🧙
Planning the project
Still here? Great, we can go through how I created this CLI. What do you do if you're tasked with a new project with no idea of where to start? You google the most direct question. With zero experience in building CLIs I decided to make this query
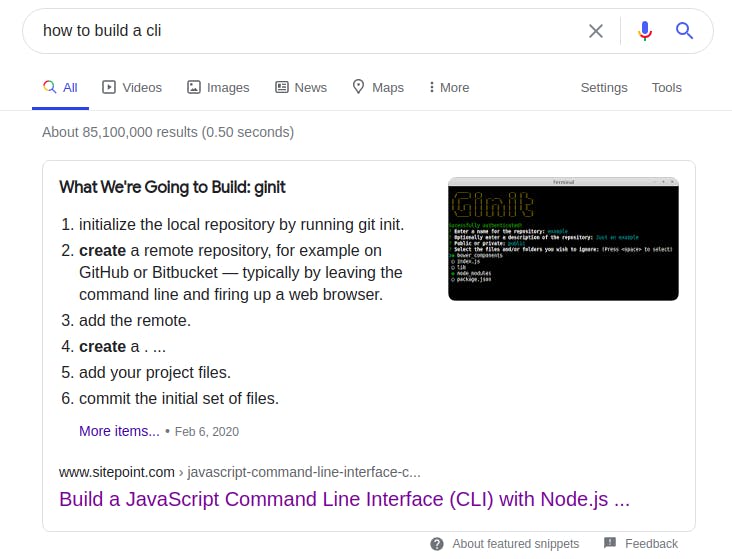
After jumping between tutorials, I landed on The Code Babarian Article on building CLIs. I didn't like the yargs CLI framework he used, but I saw oclif at the bottom of the article. I knew my search had finally ended.
Initial Plan
My initial plan was to build a CLI that takes a path to a markdown file, extract the text and makes a mutation to Hashnode's API.
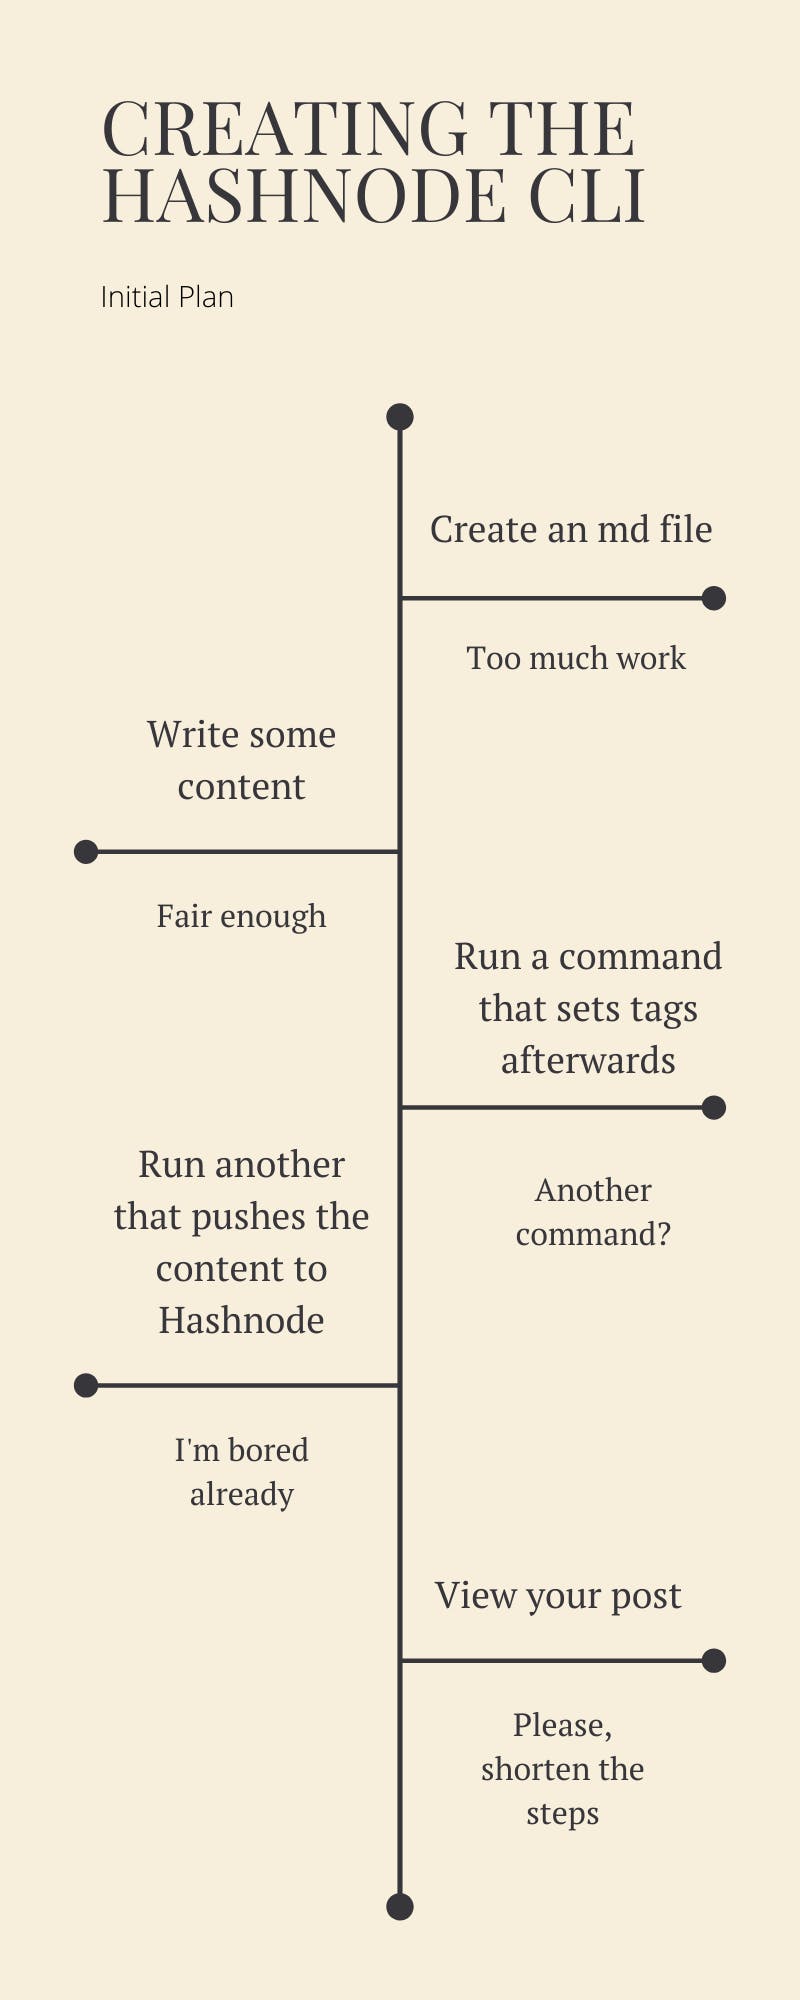
I quickly learned that this approach requires the user to create an actual file, type in it and delete the file. This is a long process which is definitely not seamless. So I had to modify this plan.
Plan B
My plan B was to enable users to follow this process
- Invoke the create-story command which opens VSCode or the default text editor in a sync process like
git commit --amend - Write the content of their story in markdown
- Add tags
- Publish the story I had to modify step 1 because I couldn't ensure that the post creation process doesn't exit before the user writes their story.
Building the project
I started building on the 25th. I built it pretty fast, thanks to oclif's good documentation. I didn't encounter any serious issue. The only issue I ran into was using the graphql API. Aside from Gatsby projects, I had never worked with client-side graphql. So I moved from using axios like this
  const { data: { data: tagCategories } } = await axios({
    url: "https://api.hashnode.com/graphql",
    method: "post",
    data: {
      query: `
          query {
            tagCategories{
              _id
              name
            }
          }
            `,
    },
  });
  console.log(tagCategories)
to using @octokit/graphql like this
  const { tagCategories } = await graphql(
    `
      query {
        tagCategories{
          _id
          name
        }
      }
  `,
    {
      baseUrl: "https://api.hashnode.com/graphql",
    }
  );
  console.log(tagCategories)
You can play around with these examples in this repl
Use Cases and Problems Addressed
- Writing in zen mode
- Community project for the Hashnode
- Impressing friends that your dear blogging platform has a CLI
- Being cool 😎
Next steps
The next steps will be
- Adding more features to the CLI, supporting more editors like vim, code, gedit, etc
- Implementing a draft feature
- Writing tests (very important), etc. I'm highly open to feedback both on the code and future features. Thanks for reading. Please leave a star on the repo. Season's greetings and Adios ✌🏾🧡.